The other way to remove tourists from your shots

Hey guys,

As promised here is the other way (actually one other way there are others) to removed undesired tourists from your vacation shots.

For that you are going to have to use a bit of photoshop.

I am not going to go to much into the details as you can learn more about it here (the video is very interesting but if you want to see just the part about tourist removal you can jump to 49 min)

But the idea is to take a series of shot without moving, waiting for tourists to move like this

Then open the photos as layers in photoshop (meaning they are on top of each other), auto align them and then mask away the tourists using the clean portions of each layer.

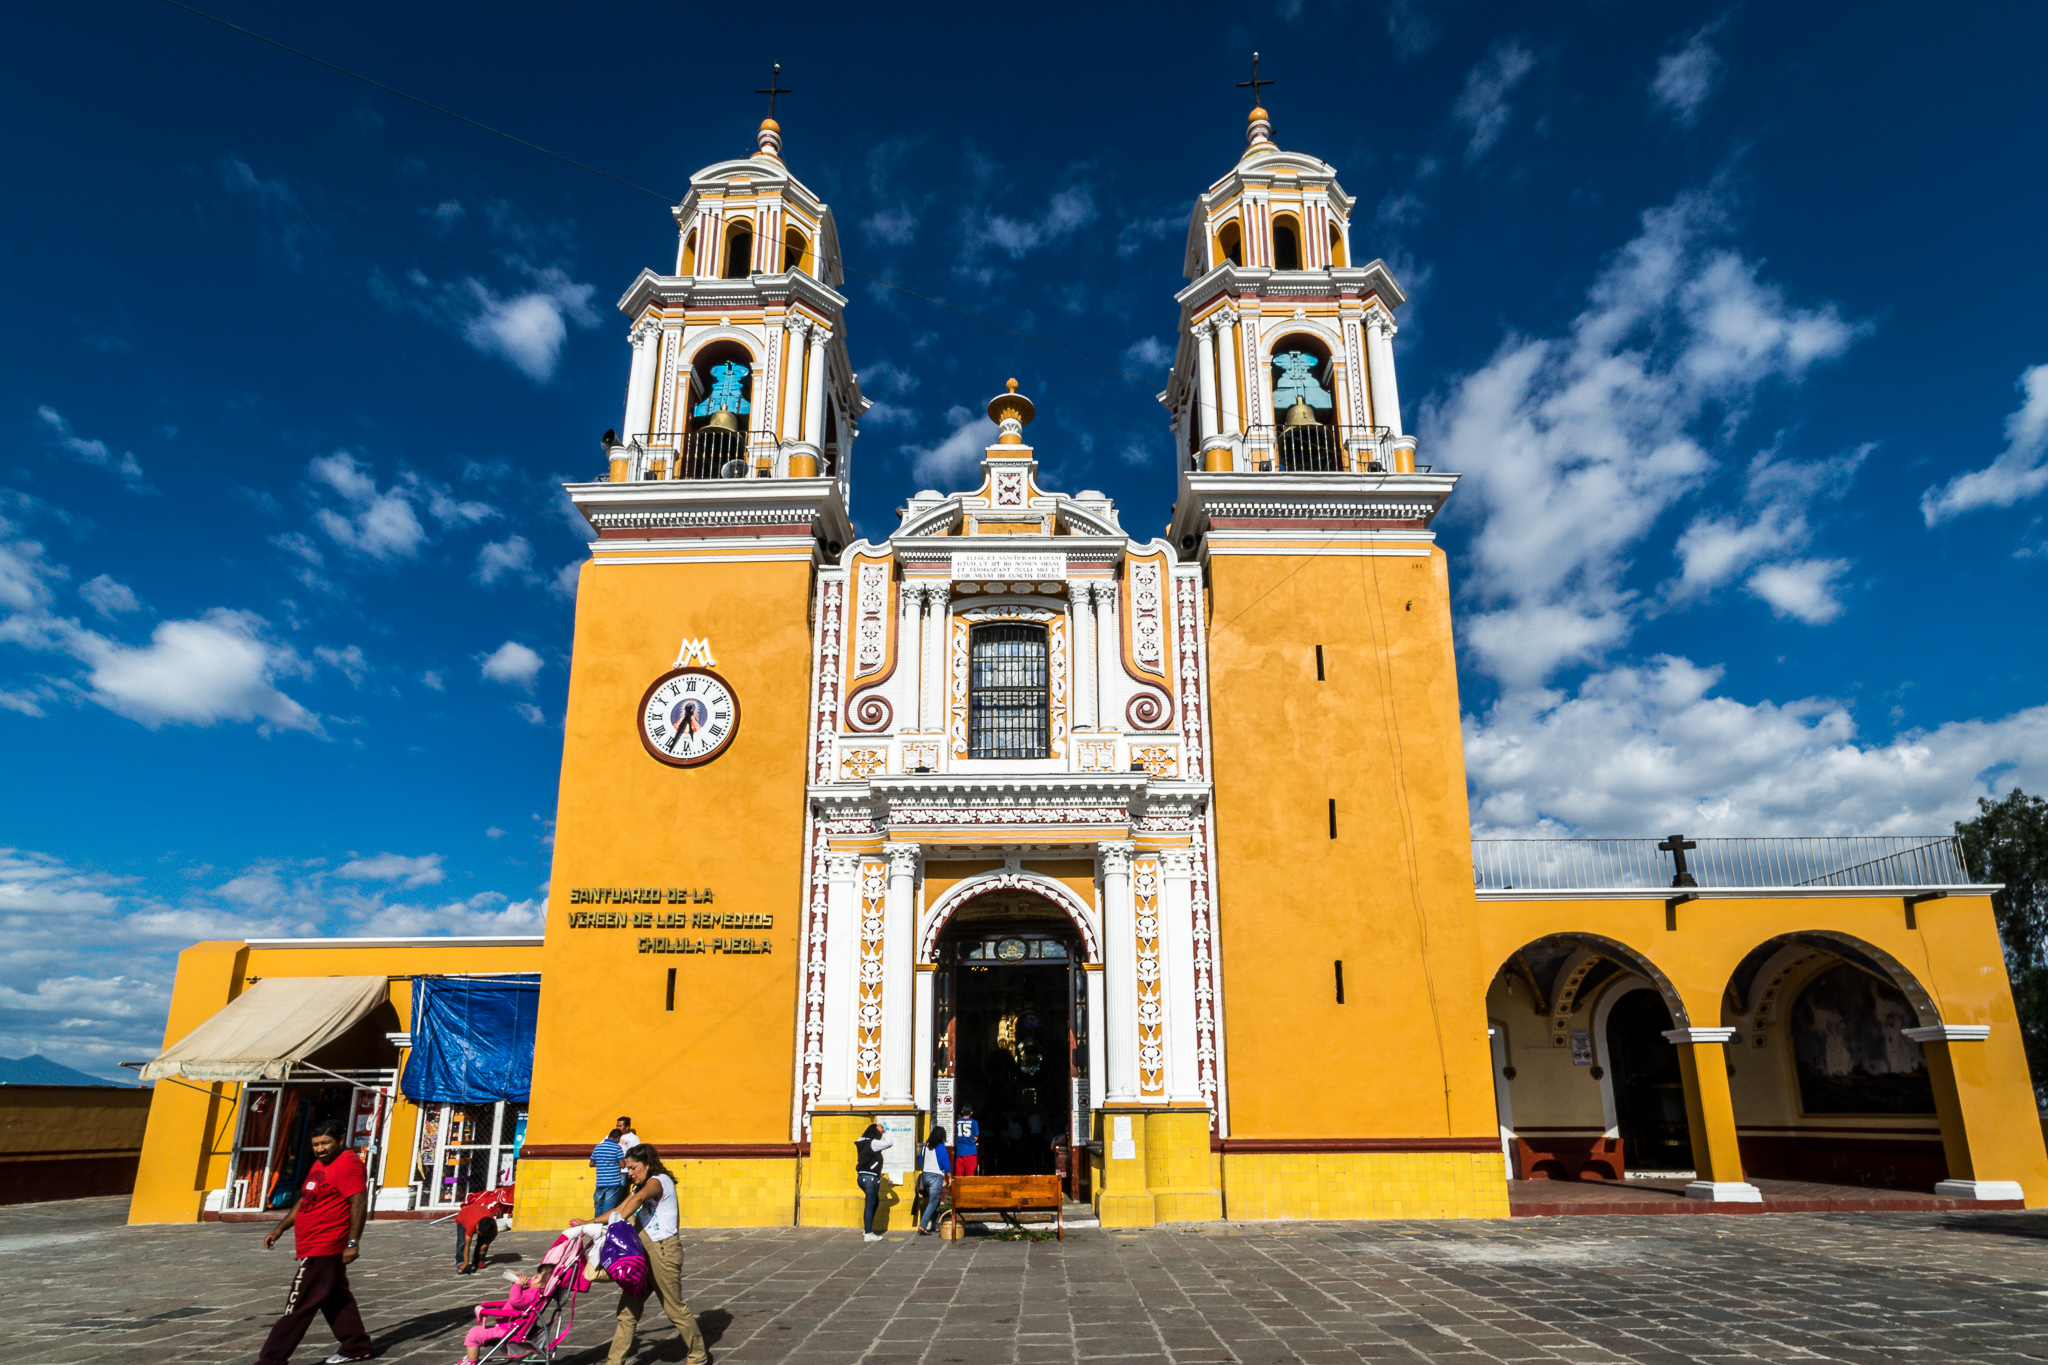
In the end you get something like this:

Mexique Juin 2014_004.jpg


The secret to this is simple, the more you wait the easier your job will be.

So next time you are on vacation somewhere, be patient and take multiple shots of places ! You'll end up with the perfect "tourist free" shot!

Jeremy


They key to travel photography: getting rid of tourists!

Hello everyone,

today I am going to share a little tip with you. You know what separates a good monument photo from a snapshot that anybody can take? Tourists!

Generally the photos that poeple love from famous locations appear almost toursit free... which of course is either very (very very...) difficult or even impossible.

So what can you do?

In this post I am going to share the easy tip, in the next one we'll go over a more complex one.

So today's easy tip is, find an angle that hides the tourists:

Mexique Juin 2014_017.jpg

The reason I took this photo from a low angle and with a cactus as foreground element is not only for composition, there was tourists all over the place in front of this Church in Oaxaca (Mexico). By placing my camera carefully I was able to get rid of all of them, no photoshop involved!

So next time you are trying to shoot a crowded place try to look for interesting objects to hide the unwanted tourists.

Next up, removing tourists when there is no object to hide them, stay tuned!

Jeremy

Back from our holiday in colorful Mexico

Hey guys,

I haven't been posting for a while, my wife and I were visiting Mexico for 10 days for a friend's wedding. 

As usual when we travel, I packed up the camera and grabbed a few shots, I'll be sharing them in the next few days.

This first shot was taken in the streets of San Pedro Cholula near to Puebla. From the 3 cities we visited (Mexico City, Puebla and Cholula), Cholula is definitely the one we liked most. It's cute and colorful and you can see birght vibrant walls like this at almost every corner.

Stay tuned for more photos from Mexico

Jeremy

How my first large print was ruined... but I still liked it!

Hey guys,

So after this year's tax return I decided to invest a bit. As I mentioned in a previous article I will soon change the way you can order prints from this website. I bought a large format printer: the Epson 3880. With this little baby I can print at home sizes up to 17 inches wide. so for me that means 16x24 at home! This way when you want a print, it will be done with love with my little hands and I will ship it to you directly with a personalized note, how cool is that!

I go the printer used off ebay, I had a really good deal with the inks almost full. I went to red river paper to buy a few sheets, i took 3 different types:

  • Aurora Fine Art (fiber based textured) in 13x19 size
  • Metallic Paper in 17x25 size
  • and Baryta (classic photo paper from old labs)

I decided to test the printer with a few 4x6 images before to make sure I nail the process of color calibration (more on that later). But after being comfortable with it I decided to step up and print a 13x19 image.

I fed the paper in the printer and waiting for a few minutes.... and the print was ruined, see below

The paper touched the print head in several places and left black marks.

The reason? I was stupid, i fed the printer from the top feeder when I should have used the back one. Once i did that i printed perfectly.

This however was not completely useless. While I was not impressed with my 4x6 prints, printing on fine art paper at this size changed everything. The quality of this is just STUNNING. The paper is thick, the feeling is great and the picture just shines on it. Colors matched perfectly what i had on screen, it really looks like photos you get in museums and galleries. Overall I am really impressed with it.

Lesson learned for the feeding method, I am now ready for more. I'll keep you posted on the results of my first metallic prints (I am looking forward to this!).

I will also be travelling to Mexico, so hopefully some beautiful travel images will come back with me.

See you around

Jeremy